| Bookmark & Share | © Add This |
So, how is your iPhone experience so far in Canada going? I’m currently with Rogers and I know lots of other friends that have iPhones too. If you want to make your iPhone tricked out with a really cool app, then you should have the NES application! This is a Nintendo Entertainment System emulator for the iPhone! You can play games straight on your iPhone, with a picture of a controller too. It’s like taking a trip back in time!
How to Add NES ROMS to Your iPhone
There are a couple methods out there to add NES ROMS to your iPhone. I’m going to tell you the easiest way to do this, without the need for another program to drag and drop individual ROMS. I’ve had a few users email me asking about how to accomplish this–your wish has come true! Here we go…
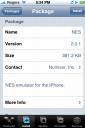
Launch Installer. Go to the “Games” category and install the NES application (can’t see it? Make sure you have the main list of “Sources” added to Installer).
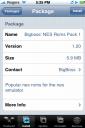
Go back to the “Games” category, and install Bigboss’ NES Roms Pack 1…this is a 5.9MB install, so it might take a while to download depending on your connection. This is a collection of the most popular NES ROMS.
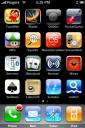
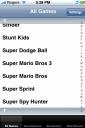
Exit Installer and “slide to unlock”…the NES icon should be on your Springboard! Time to play some games (like Super Mario Bros. 3!), baby (of course, this program is just used to play “archival” backups of your original NES games, right?)!
Screenshots:

Buy from Amazon - Ipod Touch 16GB (Black)
Buy from Amazon - Archos 605 Wi-Fi 160 GB
Buy from Amazon - Creative Zen 16 GB (Black)
Buy from Amazon - Zune 80GB (Black)
How to Add NES ROMS to Your iPhone
There are a couple methods out there to add NES ROMS to your iPhone. I’m going to tell you the easiest way to do this, without the need for another program to drag and drop individual ROMS. I’ve had a few users email me asking about how to accomplish this–your wish has come true! Here we go…
Launch Installer. Go to the “Games” category and install the NES application (can’t see it? Make sure you have the main list of “Sources” added to Installer).
Go back to the “Games” category, and install Bigboss’ NES Roms Pack 1…this is a 5.9MB install, so it might take a while to download depending on your connection. This is a collection of the most popular NES ROMS.
Exit Installer and “slide to unlock”…the NES icon should be on your Springboard! Time to play some games (like Super Mario Bros. 3!), baby (of course, this program is just used to play “archival” backups of your original NES games, right?)!
Screenshots:

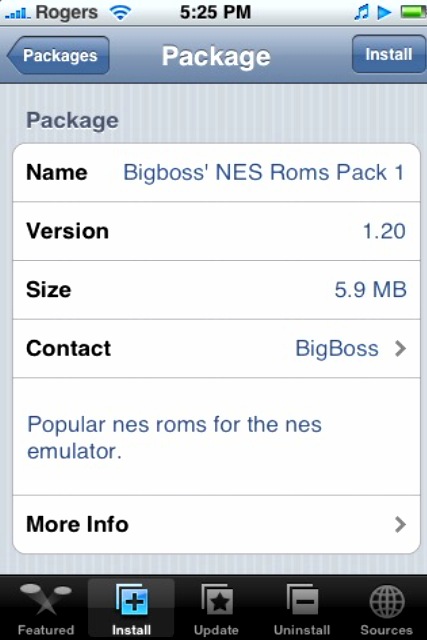
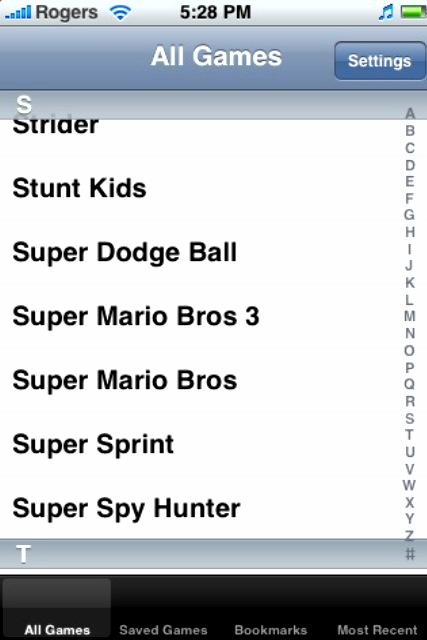
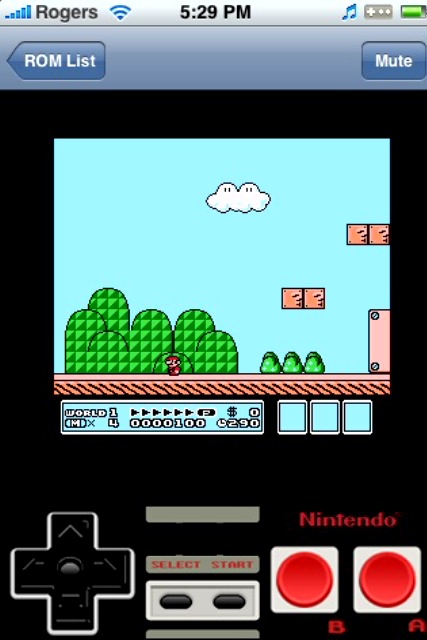
Left to Right: NES app, Bigboss’ NES Roms Pack 1, NES icon, NES ROMS list, Super Mario Bros. 3!
[iPhone in Canada]
[iPhone in Canada]
Buy from Amazon - Ipod Touch 16GB (Black)
Buy from Amazon - Archos 605 Wi-Fi 160 GB
Buy from Amazon - Creative Zen 16 GB (Black)
Buy from Amazon - Zune 80GB (Black)


No comments:
Post a Comment